Preventing Hard Water Spots on a Stainless Steel Kitchen Sink
Stainless steel remains the workhorse of the modern American kitchen, prized for its structural durability, clean industrial lines, and resistance to impact. Yet, for all its rugged utility, it possesses an Achilles’ heel that frustrates even the most meticulous homeowners: hard water deposits. You scrub the basin until it shines, walk away, and return an hour later to find a cloudy, chalky constellation of white rings and water droplets dried into the metal.
These blemishes do not indicate that your sink is degrading or dirty. Rather, they are the geological remnants of your municipal or well water supply. When standing water evaporates, it leaves behind dissolved alkaline minerals that bond tenaciously to the basin floor and walls. Preventing these stubborn spots is not a matter of constant, exhausting scrubbing with harsh chemicals. Instead, it requires understanding the chemistry of your sink’s surface, establishing a simple daily routine, and applying a protective barrier that keeps water from lingering in the first place.
The Chemistry Behind the Haze: Why Stainless Steel Attracts Mineral Scale
Hard water contains significant concentrations of dissolved calcium, magnesium, and trace carbonates. Stainless steel owes its corrosion resistance to a microscopic, self-repairing shield called the chromium oxide passivation layer. This layer prevents iron from reacting with oxygen to form rust. However, this protective film is microscopically porous and readily attracts dissolved alkaline compounds.
When tap water pools along the flat bottom of the basin, surface tension holds those droplets in place. As ambient air warms the kitchen, the liquid evaporates, but the minerals cannot vaporize. They crystallize, forming crusts of calcium carbonate that mechanically anchor themselves into the subtle grain of the steel. Over weeks of neglect, these individual spots coalesce into an opaque film that dulls the metal’s reflective quality and traps food oils, making everyday cleaning increasingly difficult.
The Daily Dry-Down: Managing Residual Moisture
The most effective strategy for preventing hard water buildup is simple: eliminate the moisture before it has the opportunity to evaporate. A dry sink cannot develop water spots. While wiping down a sink after every single use might sound tedious, integrating a brief, ten-second reset into your evening kitchen routine transforms the maintenance of the appliance.
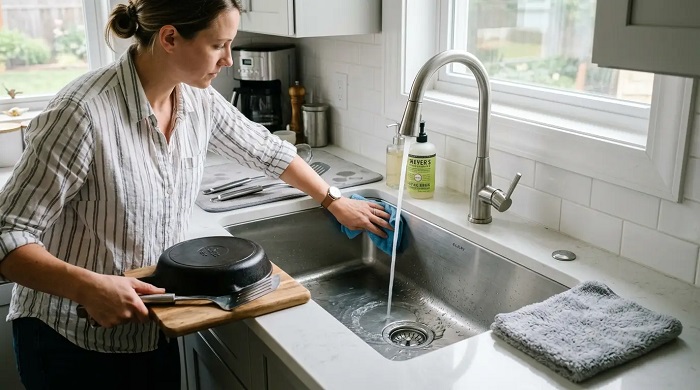
Keep a dedicated, high-absorbency microfiber cloth within arm’s reach of the basin. At the end of the evening, after the dishes are cleared and the basin is rinsed free of food debris, make a single sweeping pass across the stainless steel.
-
Focus on low-drainage zones: Target the flat floor of the sink, the tight corners where side walls meet the base, and the rim where splashing regularly occurs.
-
Dry the faucet deck: Water frequently collects around the base of the faucet and the perimeter of the soap dispenser. If left to pool, this water migrates toward the caulked edge of the sink, developing dark, crusty rings that are difficult to reach.
-
Hang dishcloths elsewhere: Leaving wet sponges, scrubbing pads, or damp rags sitting on the bottom of the basin creates a continuous microclimate of standing water, virtually guaranteeing severe mineral crusting directly beneath the item.
Safe Mineral Dissolution: Using Mild Acids Without Etching
When mineral scale does begin to accumulate, using aggressive abrasive powders or stiff wire pads is the fastest way to ruin a sink’s factory finish. Coarse scrubbing scratches the brushed grain of the steel, creating microscopic trenches that give future mineral deposits an even tighter grip. Furthermore, never use chlorine bleach or cleaners containing chlorides on stainless steel; they break down the chromium oxide layer and cause pitting and permanent discoloration.
To remove existing spots safely, rely on mild, controlled acidity. Diluted distilled white vinegar contains roughly five percent acetic acid, which breaks the chemical bonds of calcium and magnesium without harming the underlying steel.
Spray the vinegar solution lightly over the affected areas and allow it a dwell time of two to three minutes. This gives the acid sufficient time to loosen the mineral lattice. Using a soft sponge or a microfiber towel, wipe the surface firmly, always moving in the direction of the metal’s visible brushed grain. Once the spots lift, immediately flush the entire basin thoroughly with warm tap water to neutralize any remaining acid, then buff the metal completely dry.
Spot-Treating Dense Buildup
For thick, stubborn mineral rings that form around the drain collar or the base of the faucet, combine vinegar with baking soda to form a mild, non-abrasive paste. Apply the paste with a soft-bristled toothbrush, working gently along the perimeter. The slight effervescence helps mechanically lift the scale without scratching the steel. Rinse immediately and dry thoroughly.
Building a Hydrophobic Protective Barrier
Once the sink is completely clean, stripped of mineral haze, and dried, the best defense is to make the surface water-repellent. In automotive care, detailers apply waxes and ceramic coatings to sheet rain off a vehicle’s windshield; the exact same principle applies to kitchen fixtures. By applying a microscopic protective film, you force water to bead tightly and roll down the drain rather than flattening out into broad puddles.
A food-safe mineral oil or high-grade bar wax acts as an exceptional water repellent for kitchen sinks.
To apply, ensure the sink is entirely dry. Place three or four drops of mineral oil onto a clean cloth and buff it evenly across the entire surface of the sink, coating the walls, bottom, and faucet hardware. Next, take a second, dry microfiber cloth and buff the surface vigorously until the metal feels smooth to the touch, with no oily residue left behind.
This micro-layer fills in microscopic surface irregularities. For the next several days, incoming water will roll effortlessly toward the drain, dramatically reducing the surface area of residual droplets and buying you time between wipe-downs. Reapply this barrier every couple of weeks, or whenever you notice water beginning to flatten out and cling to the basin walls instead of beading.
Integrating Physical Sink Accessories
Sometimes a few modest hardware adjustments can drastically limit the splash patterns and puddling that lead to water spots in the first place:
-
Install a bottom sink grid: A fitted, elevated stainless steel grid keeps pots, pans, and dirty dishes suspended an inch above the sink floor. This prevents cookware from trapping pools of water against the metal and allows air to circulate freely beneath items, facilitating faster natural drainage.
-
Upgrade to a splash-reducing aerator: High-pressure faucets that produce turbulent spray patterns throw water mist across the entire perimeter of the counter and sink walls. Switching to a laminar flow aerator creates a smooth, crystal-clear stream of water that reduces splashing at the source.
Maintaining a pristine stainless steel sink does not require aggressive elbow grease or industrial chemicals. By neutralizing existing mineral scale with gentle acids, establishing a quick nightly drying habit, and sealing the metal with a water-repellent barrier, you can keep your kitchen’s centerpiece gleaming, free of cloudiness, and effortless to maintain.