The Ultimate Guide to Using Microcement in Your Bathroom
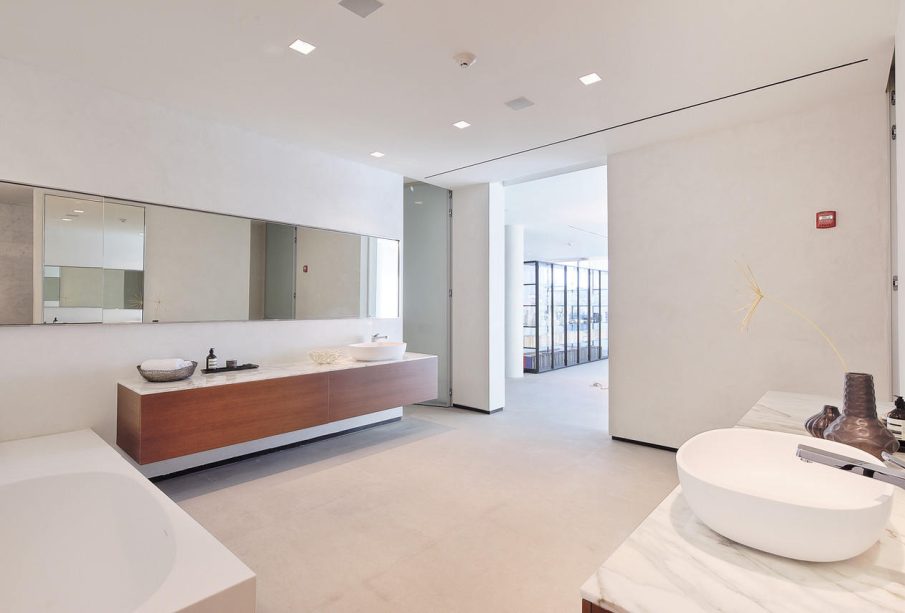
If your bathroom currently screams “1990s tiles and questionable grout,” microcement might just be the glow‑up it’s been waiting for. In this clear, no‑nonsense guide, we’ll walk you through planning your zones, scope and spend, nailing the look (colour, texture and safe‑under‑soap feet), prepping substrates and waterproofing properly, then installing like a pro with the right tools, layers and timings – plus the care habits that keep everything watertight and beautiful for years.
Plan Your Bathroom Zones, Scope and Budget
Start by zoning your space so you don’t microcement everything just because it looks cool. Decide precisely where it goes: dry walls, splash areas around the basin, the shower enclosure, the floor, and the vanity or bath panel. Confirm the substrate suitability – no loose boards, no crumbling plaster, no guesswork. Keep existing movement joints and plan proper falls to the drain in showers (2% gradient is the sweet spot). Measure each surface (width × height), total the m², then add 10% waste because offcuts and edges eat product. For timelines, think 3–5 days install, then hands off until 5–7 days curing for full wet use. Build a clear budget that includes surface preparation, tanking where water hits, installation, and protection during fit-out – then bolt on a 10–15% contingency. Here’s an example planning snapshot to keep it visual and real-world: Area (m²) | Typical install time | Estimated cost (UK) – 6 (walls only) | 2–3 days | £540–£960 materials DIY; £540–£960 labour if pro; or £90–£160/m² supply+fit – 10 (walls+floor) | 3–5 days | £900–£1,600 materials+labour per m² guide – Shower enclosure (4 m²) | 2–3 days (incl. tanking) | Add £120–£300 for tanking details.
Keep it practical. Example: We’ll coat 8 m² (shower walls + vanity wall). Budget £1,000–£1,400 supply+fit; allow 4 days. That’s lean, sequenced, and realistic. If you’re DIY, pencil in extra time for primer, base coats, microcement finish coats, and sealer; if you’re hiring, ask for written confirmation on substrate prep, tanking membranes, and cure times. The goal is a tight scope, crisp numbers, and a surface that looks editorial without blowing the budget – or your schedule.
Design Choices: Colours, Textures and Slip Safety
Lock in your aesthetic first, then make sure it won’t turn treacherous when the floor’s covered in suds. Keep the palette tight: one to two main tones that suit your bathroom’s light and size. Coordinate the details so it feels deliberate, not random. Warm metals (brass, bronze) love earthy microcement tones; chrome or black sits better with cool greys. Choose a texture grade that fits the mood: fine for subtle and sleek, standard for a bit of movement, coarse when you want character. Always judge sample boards under your actual bathroom lighting – raking light will throw every trowel stroke into the spotlight, so position downlights to flatter, not expose. For the topcoat, matte sealer hides marks, satin balances cleanability and depth, and gloss belongs on walls only – never on floors. Planning underfloor heating? No drama. Just allow for expansion breaks at thresholds so the finish stays crack‑free.
- Slip safety target (floors): PTV ≥36 wet. Hit it with a fine or coarse texture plus an anti‑slip additive in the topcoat; avoid glossy floors.
- Finish selector (example):
- Fine texture – best for walls, vanity, bath panel; matte/satin
- Standard texture – ideal for general bathroom floors; aim for PTV ≥36 wet with matte/satin.
- Coarse + anti‑slip – for showers and wet rooms; target PTV ≥36–40 wet with matte.
- Lighting strategy: keep harsh, low angles off feature walls; use soft, diffuse light to calm visible trowel marks.
- Coordination tip: “Satin, standard texture on the main floor; matte, fine on the walls; anti‑slip in the shower.”
Prepare Substrates and Waterproofing for Wet Areas
Microcement in bathrooms only performs as well as the surface beneath it. Treat prep like gospel: the base must be flat, dry, stable, and fully waterproof before a single coat goes near it. Audit every surface you plan to coat: existing tiles, cement board, plaster, screed, plywood (steer clear in showers), or old paint. Tiles need a scrub to degrease, a mechanical key (80–120 grit), grout lines filled with a levelling compound, and a compatible primer for microcement. In showers, swap plasterboard for cement backer board, tape joints, and fully tank the area. Proper tanking membranes should wrap corners, niches, and pipe penetrations with manufacturer-approved overlaps, and floors must fall to drain at 1:60–1:40 so water goes away, not sideways. Screeds must be fully cured and dimensionally stable; with underfloor heating, run a full heat cycle up/down before works, then turn the UFH off 48 hours before and after installation. Surfaces must be visibly dry (no dark patches) and if there’s doubt, throw down an adhesion test patch. And no, you can’t cheat structure: movement joints must be honoured through the finish with slim profiles – never bridge a structural joint.
- Audit surfaces: tile, cement board, plaster, screed, plywood (avoid in showers), existing paint.
- Tiles: degrease, key with 80–120 grit, fill grout lines with levelling compound, then prime for microcement.
- Showers: replace plasterboard with cement backer board, tape all joints, then tank.
- Tanking: apply membrane across wet zones; detail corners, niches, penetrations; respect overlap rules; ensure a 1:60–1:40 fall to the drain.
- Screeds: fully cured and stable; for heated screeds, complete heat cycles; switch UFH off 48 h before/after install.
- Moisture: surfaces must be dry – no dark patches; do an adhesion test patch if unsure.
- Movement joints: carry them through with slim profiles; never bridge structural joints.
- Checklist: present these as tick boxes in your site’s guide so installers can verify each step.
Install Microcement: Tools, Layers and Timelines
Read this like a battle plan you can hand to a contractor and not get rinsed. Room conditions make or break the finish: keep it at 15–25°C, RH under 70%, and avoid draughts or direct sun. Gear up with a mixing paddle, steel trowels, sanding mesh 80–400, vacuum, microfibre rollers/brushes for the sealer, and proper masking/protection. The build should land around 2–3 mm total: prime the substrate that’s actually there, lay a base coat with fibreglass mesh in wet zones and high‑traffic spots, add a second base coat, then microcement coat 1 (fine or standard), microcement coat 2, burnish/sand progressively and vacuum clean, and finish with a sealer system of 1 primer coat + 2 water‑based 2K polyurethane coats. Keep timings tight but sane: about 3–4 hours between coats, leave it overnight before sealing, and give it 5–7 days before heavy or wet use. Respect edges and details: seal all penetrations, run silicone at changes of plane, and keep movement joints clean and free.
- Step sequence (clean and fast): Day 1 – prep, prime, mesh + base. Day 2 – second base + coat 1. Day 3 – coat 2 + progressive sanding. Day 4 – sealer x2 and de‑mask.
- Non‑negotiables: don’t over‑trowel (you’ll get burn marks), never skip mesh in showers, don’t seal too soon, and keep dust out from under the sealer.
- Practical checks: touch‑dry isn’t cured – time your layers; vacuum between sanding grits; keep lighting raking across the surface to spot trowel lines before sealing.
Care, Cleaning and Small Repairs
Keep microcement looking sharp by treating it like a premium finish, not a garage floor. For the first week, go light on use: wipe any standing water, keep showers short, and stick to no harsh cleaners. For everyday life, a pH‑neutral cleaner with a soft cloth or microfibre mop is your best mate; use a squeegee after every shower to cut limescale. Hard no’s: bleach, ammonia, acidic/alkaline descalers, scouring pads, steam mops, and rubber‑backed mats that can stain. Add felt pads under stools or vanity legs, choose breathable bath mats, and lift – don’t drag anything. Build the habit: a quick 30‑second rinse and squeegee beats a weekend scrub.
Sealant is your invisible bodyguard. Wet floors typically want a reseal every 12–24 months; walls usually go 24–36 months. Reseal sooner if water stops beading or you see dark patches that linger after drying. Spot repairs are straightforward: for a light scratch, clean the area, nib with 400‑grit, then apply a spot sealer. If you’ve got a chip to the base, patch with matching microcement, sand to blend, and re‑seal the full panel for a seamless sheen. Keep a simple care card in the bathroom with a do/don’t list and your installer’s contact. Example note to include: “Annual 30‑min check: test water beading in the shower; book reseal if needed.”
| Task | What to Use | Avoid | Frequency | Real‑world example |
| Daily clean | pH‑neutral cleaner, soft cloth, squeegee | Bleach, scouring pads | After showers | 2‑minute squeegee prevents limescale build‑up in a hard‑water flat |
| Weekly refresh | Microfibre mop, lukewarm water | Steam mops, ammonia | Once a week | Quick mop keeps a family bathroom matte and streak‑free |
| Resealing floors | PU/water‑based sealer (installer‑approved) | Skipping prep or dirty surfaces | Every 12–24 months | High‑traffic ensuite gets a fresh seal at 18 months when beading fades |
| Resealing walls | PU/water‑based sealer | Over‑application causing cloudiness | Every 24–36 months | Shower walls re‑sealed at 30 months after dark patches linger |
| Light scratch repair | 400‑grit paper, spot sealer | Coarse sanding | As needed | Watch strap scuff disappears after a careful nib and spot seal |
| Chip repair | Matching microcement, sanding, full‑panel reseal | Partial reseal lines | As needed | Dropped bottle chip patched, sanded, and panel re‑sealed for uniform finish |
| Protection | Felt pads, breathable mats | Rubber‑backed mats | Ongoing | Felt pads stop hairpin‑leg stool from marking the floor |
Check out products: Microcement for showers